If you’re not already using the excellent Pi-hole® to improve your network performance by blocking trackers and bad ads then it’s very easy to install. If you want to take things further then you can read my extended guides too.
Pi-hole® has come a long way and now allows you to filter at an individual device level. It’s great for blocking ads and trackers on devices that don’t allow as much control as an ordinary computer. However, there are limitations and it can only block third-party ads/trackers that use their own domains. It can’t block ads that are first-party and tightly integrated into services, so you’ll still need to use web browser extensions or avoid social media (or both).
This is a guide showing how to update Pi-hole on a Raspberry Pi running Raspberry Pi OS Lite. I assume you have burnt the SD card directly with Raspberry Pi Imager (1.6.2) or similar and not NOOBS, which is deprecated (it messed with the partition layout). However, the instructions are pretty simple and should work on other setups (they’re just not tested on them).
It’s an easy process but this is a step-by-step guide for those that rarely deal with these sorts of systems. If you only have a single Linux box to administer then you’ll probably only need to do this once a month so may forget.
Update
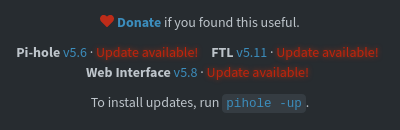
If you visit the web interface of your local Pi-hole® at pi.hole then the current version is shown in the footer.

If updates are available then this is shown in the footer too and it includes the command to run.
If you want to update then choose a time when you are not using the internet and backup anything important on the pi just in case.
You then need to SSH (Secure Shell) into the pi. On Linux or macOS, simply open a terminal. On Windows open PuTTY (or maybe Windows Terminal or WSL - I’ve not used Windows in a while).
The command is in this form:
ssh <user>@<hostname>
So to connect to the pi-hole as the pi user run:
ssh pi@pi.hole
If this does not work then you can try the hostname instead. This is shown on the top right of the web interface (to the right of hostname:, left of logo). For example, if using default pi user and default raspberrypi hostname try:
ssh pi@raspberrypi.lan
If this doesn’t work you can also try .local via mDNS e.g.:
ssh pi@raspberrypi.local
If you have multiple pis on your network then it’s a good idea to give them unique hostnames.
If that fails then try the IP address if it is static e.g.:
ssh pi@192.168.0.200
You may be prompted for a password if you set one up (it should be strong, long and unique). However, key-based authentication is much better (more secure and easier).
Then simply run:
pihole -up
I like to take this opportunity to update other things too.
sudo apt-get update -y && sudo apt-get upgrade -y
You could also do a dist-upgrade if upgrade fails to upgrade some things.
For good measure I normally restart the pi.
sudo reboot
All done. Check the internet is still working once it comes back up. You should see the new version in the pi-hole footer.

Updating is easy but setting up a pi-hole with certain ISP routers can be a little tricky if they don’t let you set custom DNS settings. In this case the pi needs to perform DHCP duties too. I’ll write a guide on that another time.
I can provide a full service if you don’t want to DIY and supply a complete package of hardware assembly, software installation, configuration and setup. Get in touch if you’re interested.